Does the though of icing a cake or a biscuit strike fear into every fibre of your being? If you’d asked me this a few years ago, my answer would not have been a positive one. My glacé icing was inconsistent, my buttercream often melted, and nothing was smooth! But I learned, and I made lots of notes; I tweaked and tried, and now I can share with you how to make perfect icing every time!
Let’s start right at the beginning by breaking down the main types of icing you’re likely to come across:
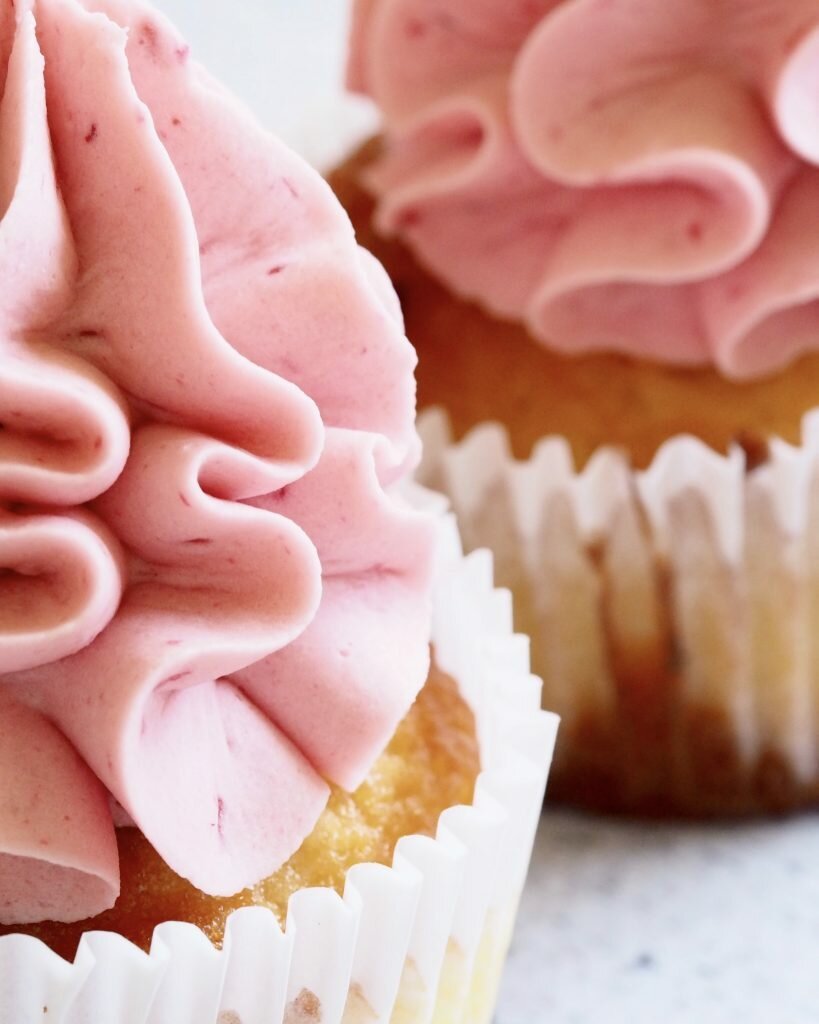
- Buttercream—soft and pliable. Perfect for filling and coating layer cakes and cupcakes.
- Glacé icing—perfect for drizzling onto cakes or for topping small cupcakes (usually followed by sprinkles).
- Royal icing—dries hard. Great for line and flood icing biscuits. Traditionally used on fruit cakes and wedding cakes as it can be piped into intricate designs that set hard. Also helps to lengthen the ‘shelf-life’ of the cake.
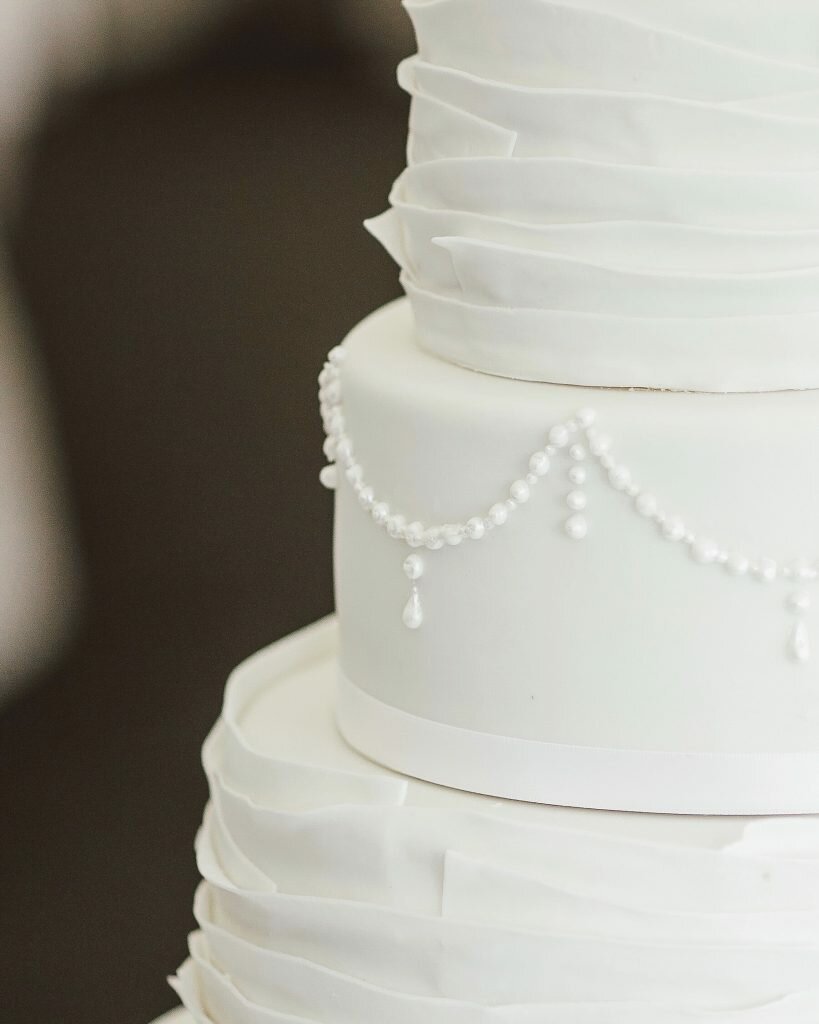
- Fondant—icing that can be rolled out into sheets and used to coat cakes. Also great for making decorations and cake toppers.
The first time…
As a child, glacé icing was probably the first icing I ever came across, and it would have been from one of those packets of cake mix that came with rice paper toppers of cartoon characters (probably Pokemon). I’m sure you can all relate! (This is probably the easiest icing to master.)
As for buttercream, my first would have been that small dollop of icing you put into fairy cakes to stick on the ‘wings’, a British classic. On a side note, my Nan’s fairy cakes were actually the best. They were half pink and half blue, and I could never figure out how she did it! (Turns out, she made a pink batter and a blue batter and spooned a teaspoon of each into every cupcake case so that they would be half-and-half… Simple enough, but a feat of pure magic to a ten year old boy, I assure you.)
As for royal icing and fondant? Well, as a child, royal icing didn’t make much of an appearance in the kitchen (at least, not until I really got into baking!) except in the form of writing icing, which came in easy-squeeze tubes. Remember decorating biscuits as a kid? What a mess (such fun!)
I guess the point I’m trying to make is that icing is an integral part of baking, and I’m sure we can all recall the first time we experienced the pleasures of each of them as children. As adults, it should be exactly the same: enjoyable!
Perfect icing, every time.
 Below are my recipes for each type of icing mentioned above (except fondant), and the portions should be enough to cover 12 cupcakes or an 8″ two-layer cake. For a larger cake, I would suggest doubling the recipes and refrigerating or freezing the leftovers (depending on how quickly you’re likely to reuse them!)
I haven’t posted a recipe for fondant for one reason, and one reason alone… I don’t make it. Surprisingly, it is much more convenient to buy it from the shop and it is also the perfect consistency (every time!)
Buttercream
Trawl the internet and most websites will tell you that a 50:50 ratio of butter to icing sugar is the perfect ratio for good buttercream. Well, I don’t believe that for one minute. I have always found it to be too soft and more likely to melt in the summer.
You’ll also probably find a big debate on butter vs. margarine and pure icing sugar vs. a sugar/starch mix. Well don’t worry. I’ve done the trial and error for you and here’s what I’ve come up with.
I like to use Aldi’s icing sugar. Aldi bulk their icing sugar with cornflour. It sounds cheap but it actually really helps with the consistency of the buttercream icing. Aldi’s own is the one that I have found to give the most consistent results.
As for butter vs. marg: I find a margarine that has buttermilk in it works best as it add the butter flavour but isn’t so quick to melt in the heat like butter would. There are plenty of them out there but it’s the “I can’t believe it’s not butter” kind you’re after.
Ingredients
- 200g margarine
- 500g icing sugar
- 1-2 tsp. natural flavouring (vanilla, lemon, mint, etc.)
- 1 tbsp. milk (if required)
Method
- In a mixer, beat your butter with a whisk attachment for 5 minutes until very pale. I suggest using a whisk attachment, as you want to incorporate lots of air to make it pale.
- If you have a stand mixer, now is the time to change to a paddle attachment. You don’t want to keep adding air now as it will create too many bubbles and this will impede a smooth finish on your cake. If you don’t have a stand mixer, a wooden spoon is best.
- Add your icing sugar a spoonful at a time (to avoid creating a sugar cloud!)
- Once all of the icing sugar is incorporated, add your flavouring and beat for a further five minutes.
- Your buttercream should be spreadable but should hold a peak. If it’s too stiff, add a drop or two of milk. If it’s a bit loose, add a teaspoon of icing sugar.
- Once you have the right consistency, you need to knock out air pockets. Using a rubber spatula, move the icing back and forth against the side of the bowl, as if you were trying to coat the bowl in a smooth layer of icing. Scoop and drop back into the bowl, and repeat until you can no longer see lots of little air pockets/bubbles.
- Place the icing in the fridge to firm for up to 30 minutes, mixing every so often to stop it crusting over.
- Your icing is ready to use.
Glacé icing
 As I mentioned above, this is probably the first kind of icing most of us will have ever come across and used ourselves. It is one of the easiest to master, but getting the consistency right requires a little practice. Here’s a good guide to get you started.
Ingredients
- 125g icing sugar
- 15-20ml luke warm water
Method
- Sift the icing sugar into a bowl.
- Add 15ml of warm water and stir until the icing becomes thick enough to coat the back of a spoon.
- If necessary, add more of the water (a drop at a time) to adjust the consistency. I say 15-20ml as I usually find that 15ml is enough but a friend followed my recipe and said she needed more. Basically, though, you just need to add water (a couple of drops at a time) until the icing is pourable.
I often do a test drizzle on some baking parchment to check whether the icing drizzles well. You need it to be thick enough to stick and not be transparent, but not so thick that it gloops instead of running nicely. (A bit thinner than toothpaste consistency, say.)
For icing cakes, a little thicker is better.
Royal Icing
 Royal icing is great for icing cakes that need to last a bit longer. It’s also great for piping sugar flowers. Personally, though, I find I use it most to decorate biscuits.
Royal icing can seem a pain to make as it uses egg whites , but it really isn’t all too difficult to make. Just brace yourself, and dive in! And, on the plus side, it’s dairy-free!
Please note: this icing contains raw egg.
Ingredients
- 500g icing sugar (pure icing sugar works better here)
- 3 egg whites
- 1 tsp. glycerin
- 1 tsp. lemon juice
Method
- Place the egg whites in a clean, grease-free bowl.
- Whisk the egg whites until light and fluffy.
- Next, stir in the icing sugar, a spoonful at a time.
- Add the glycerin and lemon juice and beat the icing until stiff. The icing should create stiff peaks in the bowl and fall in thick dollops from the spoon.
If you want to create a smooth-finish on your cake, you may need to add a little more egg white to thin the icing. Otherwise, this icing is great for creating a peaky or swirled finish.
And there you have it, three recipes for three totally different types of icing! I really do hope you will find these recipes useful. I personally come back to them whenever I bake a cake that needs icing and find it useful having all my icing recipes in one place for easy reference.
If you have any issues with your icing, I am more than happy to try and troubleshoot: just leave a comment below or email me at
Happy baking! x
